When it comes to creating a visually appealing and user-friendly website, the design and functionality of the navigation menu play a vital role.
One popular WordPress theme that offers extensive customization options for menus is GeneratePress. With GeneratePress, you can effortlessly style your primary and secondary menus using custom CSS, allowing you to tailor them to your website’s unique branding and design requirements.
In this post, we will delve into the world of GeneratePress and explore how you can harness the power of CSS to transform your menus into eye-catching navigational elements. Whether you want to make subtle tweaks or completely revamp your menus, GeneratePress empowers you to create menus that seamlessly blend with your website’s overall aesthetic.
Disable Primary Menu
If you’ve set the primary navigation to “float right” then you can remove it by using this PHP snippet:
add_action('after_setup_theme', function(){
	remove_action( 'generate_after_header_content', 'generate_add_navigation_float_right', 5 );
});
Adjust Breakpoint
//Adjust Breakpoint to make menu work on Desktop
add_filter( 'generate_mobile_menu_media_query', function() {
    return '(max-width: 2000px)';
} );
add_filter( 'generate_not_mobile_menu_media_query', function() {
    return '(min-width: 2001px)';
} );
Remove Menu Scripts
//Remove Scripts for Mobile Primary Menu
add_action( 'wp_enqueue_scripts', 'tu_remove_menu_scripts', 50 );
function tu_remove_menu_scripts() {
   wp_dequeue_script( 'generate-menu' );
   wp_dequeue_script( 'generate-dropdown' );
   wp_dequeue_script( 'generate-modal' );
}
Add Menu Bar Items
//Add Search SVG to menu bar
add_action( 'generate_menu_bar_items', function() {
    ?>
        <span class="menu-bar-item">
            <a href="https://cse.google.com/cse?cx=63485f5144881544d" aria-label="Search">
                <?php echo generate_get_svg_icon( 'search', true ); ?>
            </a>
        </span>
    <?php
} );
GeneratePress: CSS Code to Center the Primary Menu
If you want the primary menu to be in the center, try this CSS code
@media(min-width:1024px) {
nav#site-navigation {
    width: 100%;
}
div#primary-menu {
    margin-left: auto;
    margin-right: auto;
}
}
GeneratePress: Padding for Primary Menu
If you need to add some padding to the primary menu, this is the CSS snippet you need
.main-navigation ul {
	padding-top: 15px;
}
GeneratePress: Padding for Submenu Items
If you need to add a little bit of padding at the top and the bottom of the submenus, you can use this CSS code
.main-navigation ul ul {
    padding-top: 20px;
    padding-bottom: 20px;
}
GeneratePress: CSS Code for the Mega Menu
This is the minified CSS code that I am using for the GeneatePress mega menu, I made adjustments to the padding
@media (min-width: 1099px) {
    nav .main-nav .mega-menu {
        position: static;
    }
    nav .main-nav .mega-menu > ul {
        position: absolute;
        width: 100%;
        left: 0 !important;
        display: flex;
        flex-wrap: wrap;
        padding: 20px 0 20px 5px;
    }
    nav .main-nav .mega-menu > ul > li > a {
        font-weight: normal;
        font-size: 16px;
    }
    nav .main-nav .mega-menu > ul > li {
        display: inline-block;
        width: 25%;
        vertical-align: top;
    }
    nav .main-nav .mega-menu.mega-menu-col-2 > ul > li {
        width: 50%;
    }
    nav .main-nav .mega-menu.mega-menu-col-3 > ul > li {
        width: 33.3333%;
    }
    nav .main-nav .mega-menu.mega-menu-col-5 > ul > li {
        width: 20%;
    }
    nav .main-nav .mega-menu ul .sub-menu {
        position: static;
        display: block;
        opacity: 1;
        visibility: visible;
        width: 100%;
        box-shadow: 0 0 0;
        left: 0;
        height: auto;
        pointer-events: auto;
        transform: scale(1);
    }
    nav .main-nav .mega-menu ul.toggled-on .sub-menu {
        pointer-events: auto;
    }
    nav .main-nav .mega-menu .sub-menu .menu-item-has-children .dropdown-menu-toggle {
        display: none;
    }
}
GeneratePress: Make Toggle Transparent
This is the CSS that you need to make the CCS Transparent
.mobile-menu-control-wrapper .menu-toggle, .mobile-menu-control-wrapper .menu-toggle:hover, .mobile-menu-control-wrapper .menu-toggle:focus, .has-inline-mobile-toggle #site-navigation.toggled {background-color: transparent;}You can unminify the code here in case you wanna have a close look at the code and what it does
GeneratePress: Add Border to the Top of Sub-Menu
This CSS will add a border on top of your sub-menu.
.menu ul.sub-menu {
    border-top: 4px solid #4c9777;
}
GeneratePress: Underline on Hover for Primary Menu
If you want to show bold underline on hover at the primary navigation menu.
@media (min-width: 769px) {
    .main-navigation .menu > .menu-item > a::after {
        content: "";
        position: absolute;
        right: 12px;
        left: 12px;
        bottom: 0;
        display: block;
        height: 5px;
        background-color: #d5db12;
        opacity: 0;
        transition: opacity 0.2s;
    }
    .main-navigation .menu > .menu-item.current-menu-item > a::after,
    .main-navigation .menu > .menu-item.current-menu-ancestor > a::after,
    .main-navigation .menu > .menu-item > a:hover::after {
        opacity: 1;
    }
}
This is another CSS snippet that will make your site show bold underline on hover at the primary navigation menu.
div#primary-menu > ul > li:hover:after, div#primary-menu > ul > li.current-menu-item:after {
    content:"";
    position: absolute;
    bottom: 5px;
    width: 60%;
    transform:translateX(30%);
    height: 3px;
    background-color: #E6836C;
}
div#primary-menu > ul > li a{
    position:relative;
}
GeneratePress: Border at the Bottom of Submenus
If you want to add a border at the bottom of the submenus, you need this bit of CSS
.main-navigation .menu ul.sub-menu li:not(:last-child) {
border-bottom: 1px solid #EEEEEE;
}
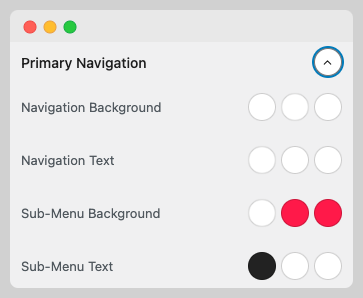
If you play with the sub-menu background and sub-menu text options.

You will make your submenu do this every time you mouse over them.
If you want to understand what I mean, check this 15-second video.
GeneratePress: Menu and Mega Menu
If you are using the regular menu and submenus and also the mega menu and you want a border at the bottom of each submenu, you need this code
nav .main-nav .mega-menu > ul > li {
    padding-left: 20px;
    padding-right: 20px;
}
.main-navigation .menu li:not(.mega-menu) ul.sub-menu li:not(:last-child) {
border-bottom: 1px solid #EEEEEE;
}
.main-navigation .menu li:is(.mega-menu) ul.sub-menu li > a{
    position:relative;
}
.main-navigation .menu li:is(.mega-menu) ul.sub-menu li > a::after {
content: "";
width:100%;
    height: 1px;
    background-color: #EEEEEE;
    position:absolute;
    left: 50%;
    bottom:0;
    transform:translateX(-50%);
}
Hide Menu for Mobile Devices using CSS and PHP
In case you want to hide the site menu on mobile devices, you can use this tiny bit of CSS
body .main-navigation button.menu-toggle {
    display: none;
}
Remember that this is a good trick for visitors but nothing you should do if you are trying to focus on speed issues.
If you want to get rid of the scripts that make mobile menu work, you should also use a PHP snippet
add_action( 'wp_enqueue_scripts', 'tu_remove_menu_scripts', 50 );
function tu_remove_menu_scripts() {
    wp_dequeue_script( 'generate-menu' );
    wp_dequeue_script( 'generate-dropdown' );
}
Different Off-Canvas Menu
If you are wondering if you can have a different off-canvas panel on different sections on your site, you have come to the right place.
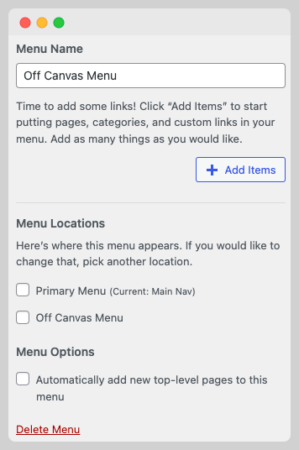
First, don’t choose any menu as your Off-Canvas Menu location

Then go to elements, choose block and title
After that, create your menu using a container and as many headlines block as you want. If you don’t want to start from scratch, you can import and check the “Flavor Template” from the GP Site Library and modify it.
Then choose the location where you want to display the block you just created
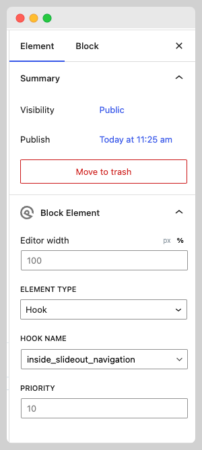
Finally, choose these options from the element settings

I have done this already and it looks good on different devices.


