In this post you will learn how to use CloudFlare Full page caching with WordPress by writing three basic page rules.
CloudFlare by default caches CSS, Images and JavaScript but it doesn’t cache HTML pages.
When you use page rules to cache your HTML pages, the majority of your content will be served from CloudFlare servers around the world and not from your server.
I like using CloudFlare Full Page Caching to improve the speed of my WordPress sites and reduce the load on my server.
Table of Contents
Am I Saving Server Resources?
If you don’t clear the cache of your site very often, you will see that more than 90% of requests are served from CloudFlare CDN.
I have used a basic Digital Ocean plan to host 9 sites and my server is healthy.
I never use the server resources available per month.
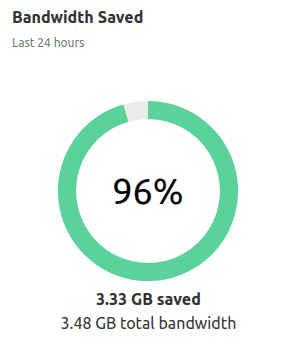
These are the stats of one of my sites, as you can see, CloudFlare is taking care of 96% of requests made to my sites.

How to Implement CloudFlare Full Page Caching
Implementing CloudFlare Full Page Caching is not that difficult
- Go to CloudFlare
- Go to your domain
- Then go to rules
- Finally write these three rules for your domain in that specific order.
This is Page Rule #1
| URL | yourdomain.com/wp-admin* |
| Pick a Setting | Cache Level |
| Select Cache Level | Bypass |
This is Page Rule #2
| URL | yourdomain.com/*preview=true* |
| Pick a Setting | Cache Level |
| Select Cache Level | Bypass |
| URL | yourdomain.com/* |
| Pick a Setting #1 | Cache Level |
| Select Cache Level | Bypass |
| Pick a Setting #2 | Edge Cache TTL |
| Enter Edge Cache TTL (required) | A month |
From the moment you do this, CloudFlare will save a copy of your content on their servers and serve it to your audience.
- Your WordPress dashboard won’t be cached
- You will be able to preview the changes you make to posts or to your theme appearance
- Your pages and posts will be fully cached.
The changes you make to your site won’t be visible until 30 days have passed and the version of your posts and pages is cleared.
Clearing your Cache Manually
You can clear individual URLs or the whole site by following these steps:
- Go to CloudFlare
- Go to Caching
- Then to Configuration
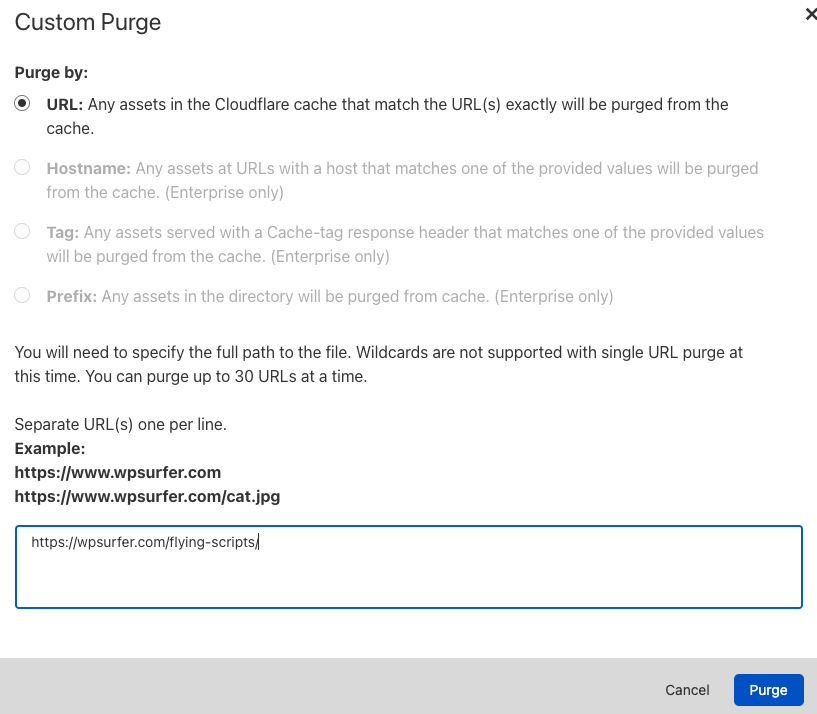
- Click on Custom Purge
- Add the URL that you want to purge from the cache

Clearing the Cache Using the CloudFlare Plugin
You can also install the CloudFlare plugin and make sure the content is cleared when you make changes in the appearance of your WordPress site

You can also clear the purge everything or purge individual files

Should I stop using my Caching Plugin?
A while ago, I stopped using caching plugins because I didn’t find a really good reason to keep them.
If you want a simple caching plugin to deal with un-cached requests, you can give Cache Enabler a Try
Are CloudFlare APO and Full Page Caching the same?

I thought that CloudFlare APO and Full Page Caching were pretty much the same thing and then I found an article by Brian Li.
The article explains some of the misconceptions that people have about CloudFlare, including the idea that CloudFlare APO and Full Page Caching are the same.
Brian says this about superiority of CloudFlare APO:
Unlike Cloudflare APO, using a “cache everything” page rule doesn’t provide you with a global replication layer that automatically copies HTML to data centers around the world.
With a “cache everything” page rule configured, a request to your site from Tokyo will only result in a page being cached in Tokyo. With APO, a request to your site from Tokyo will trigger Cloudflare to store the HTML page in Workers KV, which automatically replicates across Cloudflare’s global network within 60 seconds. To put it simply, APO effectively decentralizes your site’s origin by mirroring your site across Cloudflare’s global edge network.
4 Misconceptions About Cloudflare Automatic Platform Optimization (APO) for WordPress
So I think those statements settles the debate for once and for all.


