I don’t really wanna use an SEO plugin and I don’t wanna pay for the premium version of one of them either.
However, I really want to keep some essential features found in them.
If your goal is to have all the content on your website ranked, you likely don’t need to worry about directing crawlers on what to index.
In case you want to write some posts for your audience but not for search engines, you should probably care about a way to set up the robots meta tag.
The robots meta tags provides directives to search engine crawlers on how to handle a webpage’s content.
If you’re not interested in going back to your old SEO plugin, you should consider using a (MU) plugin for that and rely on Advanced Custom Fields to manage your robot meta settings.
Meta Robots Settings with Advanced Custom Fields
I am going to assume that you know what custom fields are.
You can create custom fields without a plugin but if you don’t want to make things complicated, use Advanced Custom Fields or Secure Custom Fields.
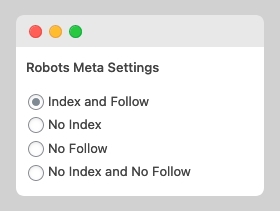
Create a field called “robots_meta_settings” to store four values:
- robots_meta_option_01 : Index and Follow
- robots_meta_option_02 : No Index
- robots_meta_option_03 : No Follow
- robots_meta_option_04 : No Index and No Follow
This is the explanation for each one of the options:
- One in case you want search engines to index the post and follow the links in it
- The second one in case you don’t want to index a page but you don’t have a problem with search engine following the links in it
- The third one in case, you want Google to index the page but not follow the links in it.
- The fourth one in case, you don’t want the page to be indexed and links in it to be followed.
These are the fields that you will find on your post settings page usually found
Do I think that all of the options are necessary?
There might be cases when you need one or the other.
I checked what SEO plugins were doing at the moment of writing this post and provided the options found in them.
First part has been solved now
Robots Meta Tags Settings with a Mu-Plugin
The second part has to do with creating a simple plugin to handle that.
I use mu-plugins to avoid using a code snippet plugin.

I am not coder, I know the basics of what you can do with computer programs, so I am sure there are better and simpler ways to handle this.
This is the mu-plugin that will robots meta tags to the head section of your pages source code:
<?php
/*
  Plugin Name: Robots Meta Settings
  Plugin URI: https://ticolibre.com
  Description: Add Robots Meta Settings
  Version: 1.0
  Author: TicoLibre
  Author URI: https://ticolibre.com
*/
// Exit if accessed directly
if (!defined('ABSPATH')) {
    exit;
}
// Filter to Remove Robots Meta Settings generated by WordPress
remove_filter( 'wp_robots', 'wp_robots_max_image_preview_large' );
// Add Robots Meta Setting to Head
function custom_robots_meta_tags() {
    // Check if it's a singular post or page
    if (is_singular()) {
        // Get the custom field value
        $robots_meta_option = get_post_meta(get_the_ID(), 'robots_meta_settings', true);
        // Check if the custom field value exists and is not empty
        if (!empty($robots_meta_option)) {
            // Based on the value of the custom field, generate the appropriate meta tag
            switch ($robots_meta_option) {
                case 'robots_meta_option_01':
                    echo "<meta name=\"robots\" content=\"max-snippet:-1,max-image-preview:large,max-video-preview:-1\" />\n";
                    break;
                case 'robots_meta_option_02':
                    echo "<meta name=\"robots\" content=\"noindex,max-snippet:-1,max-image-preview:large,max-video-preview:-1\" />\n";
                    break;
                case 'robots_meta_option_03':
                    echo "<meta name=\"robots\" content=\"nofollow,max-snippet:-1,max-image-preview:large,max-video-preview:-1\" />\n";
                    break;
                case 'robots_meta_option_04':
                    echo "<meta name=\"robots\" content=\"noindex,nofollow,max-snippet:-1,max-image-preview:large,max-video-preview:-1\" />\n";
                    break;
                default:
                    // Default meta tag if the custom field value is not recognized
                    echo "<meta name=\"robots\" content=\"max-snippet:-1,max-image-preview:large,max-video-preview:-1\" />\n";
                    break;
            }
        } else {
            // Default meta tag if the custom field value is empty or not set
            echo "<meta name=\"robots\" content=\"max-snippet:-1,max-image-preview:large,max-video-preview:-1\" />\n";
        }
    }
}
// Hook into wp_head to insert the meta tags with priority 1
add_action('wp_head', 'custom_robots_meta_tags', 1);
The first filter will remove the original Robots Meta Settings added by WordPress
The second part of the code checks the values of the custom field called “robots_meta_settings”, and based on that, it adds the directives you specified.
In case, no value is stored yet in the custom field, it will add the first option which is to index the page and follow the links in it.
You can download the robots meta tags plugin from my GitHub Repo
Why Those Directives or Tags?
I wasn’t trying to invent the wheel here.
The directives or robots meta tags were taken from the SEO Framework plugin
The SEOPress plugin have different ones:
For option number #1
<meta name="robots" content="index, nofollow">
<meta name="googlebot" content="index, nofollow, max-snippet:-1, max-image-preview:large, max-video-preview:-1">
<meta name="bingbot" content="index, nofollow, max-snippet:-1, max-image-preview:large, max-video-preview:-1">
For option number #2
<meta name="robots" content="follow, noindex">
For option number #3
<meta name="robots" content="index, follow">
<meta name="googlebot" content="index, follow, max-snippet:-1, max-image-preview:large, max-video-preview:-1">
<meta name="bingbot" content="index, follow, max-snippet:-1, max-image-preview:large, max-video-preview:-1">
For option number #4
<meta name="robots" content="noindex, nofollow">
Create a Custom Header and Content PHP File
The previous solution works well for setting directives on individual posts or pages.
However, if you want to prevent search engines from indexing an entire category or custom post type, you can use a custom header and a custom content PHP file and hard-code the directive at the head.
- Just make a copy of header and content files.
- Rename the copy lesson-header.php and lessons.php
- Add those files to your root of your theme folder
- Choose the lessons template for your lessons custom post type
- Find “get_header(‘lessons’); ?>” and replace it with the name of your custom header.
get_header('lessons'); ?>- Then add the directive you want at the header inside the wp_head tags.
- Check the source code and verify that the directive has been added to the head.
Would I do this with somebody else’s WordPress website?
Absolutely not.
This is something you do for your own sites.
Manuel Campos
I'm a WordPress enthusiast. I document my journey and provide actionable insights to help you navigate the ever-evolving world of WordPress."